
Homemade Strawberry Jam
The secret to strawberry jam is that you shouldn't judge it with your eyes while it's on the stove — it thickens as it cools. Put a drop on a frozen plate from the freezer and leave it for a minute: if it wrinkles when you push it with your finger, it is ready. Cooking it until it looks heavy in the pot makes it turn out stiff like Turkish delight and dark in color.
- Prep
- 25 min
- Cook
- 40 min
- Total
- 3 hr
- Calories
- 50
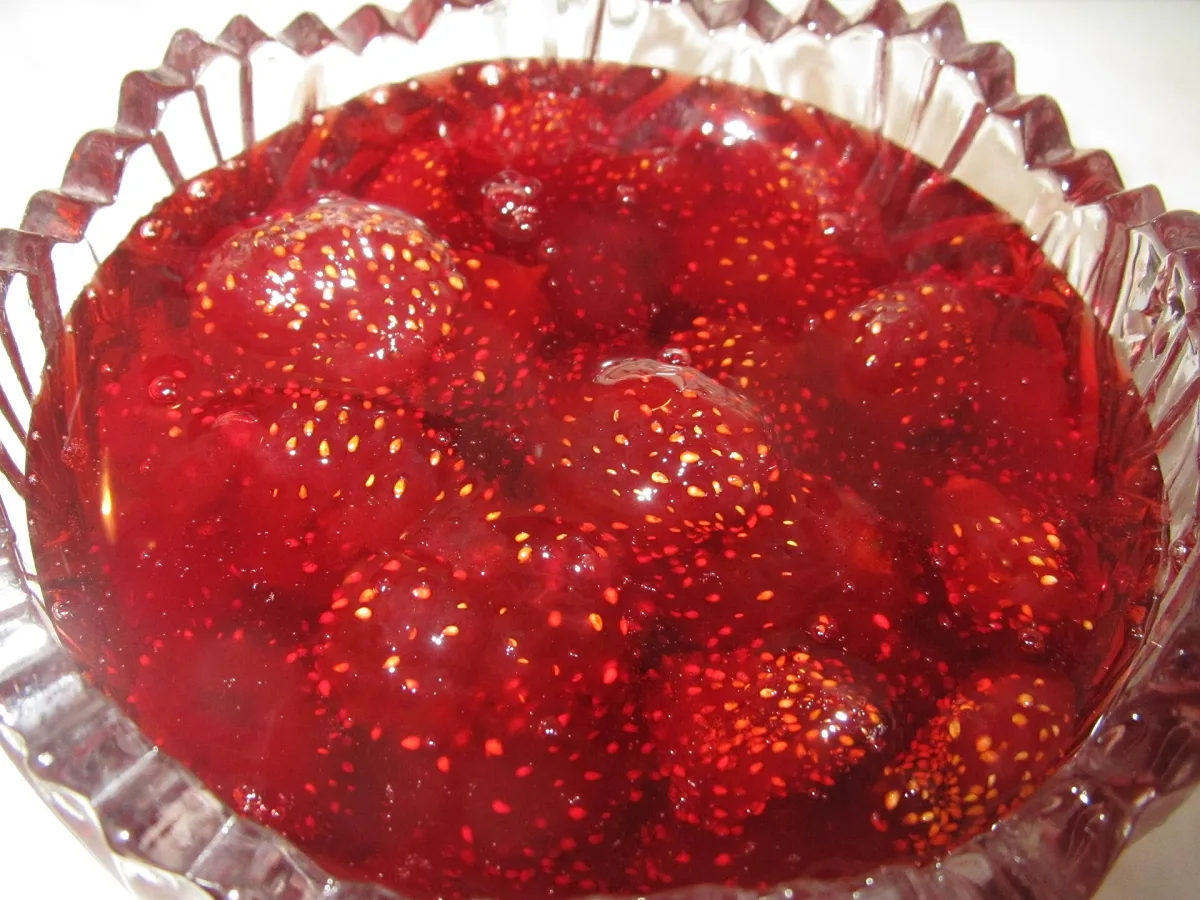
Photo: Moonsun1981 / Wikimedia Commons · CC BY-SA 3.0 · https://commons.wikimedia.org/wiki/File:Az-Strawberry_jam,_making_by_e-citizen_(moonsun1981).JPG
Homemade strawberry jam is made with just 3 things: strawberries, sugar, and lemon, without pectin or preservatives. The best time for it is the Egyptian strawberry season from December to April, when strawberries are red and full of flavor. This method leaves pieces of strawberries visible in the jam.
Method
-
1
Washing Before Hulling
Wash the strawberries while still with the green stem in cold water, dry them on a towel, and then hull them. Washing after hulling introduces water into the heart of the strawberries, so the jam takes longer on the stove and its color darkens.
⏱ 10 min -
2
Cutting
Leave small strawberries whole, and cut the large ones in half or four pieces, so all the pieces cook at the same time.
⏱ 5 min -
3
Maceration
In a wide, heavy-bottomed pot, toss the strawberries with the sugar and cover them, and leave them for at least 2 hours (or overnight in the fridge) until they release their juice and half the sugar dissolves. The pieces absorb the sugar so they stay intact and do not get mashed on the stove.
⏱ 120 min -
4
Sterilizing the Jars
Wash the jars and lids with water and soap, and put the jars in the oven at 120 degrees for 15 minutes, or boil them in a pot of water for 10 minutes. Place two small plates in the freezer for the doneness test.
⏱ 15 min -
5
Boiling and Skimming Foam
Turn on medium heat and stir with a wooden spoon until the sugar dissolves completely, then raise the heat to a strong boil. Remove the white foam that rises to the surface — the foam clouds the jam and shortens its shelf life.
⏱ 10 min -
6
Lemon and Cooking
Add the lemon juice and let it boil strongly for 15-20 minutes, stirring occasionally from the bottom so it doesn't stick. The lemon acidifies the jam so the natural pectin in the strawberries can set and thicken it, and the strong boil evaporates the water quickly so the color stays red.
⏱ 20 min -
7
The Cold Plate Test
Turn off the heat, and put half a teaspoon on the frozen plate and return it to the freezer for 1 minute. Push the drop with your finger: if it wrinkles and stays in place, the jam is ready, and if it runs, turn the heat back on for 3 minutes and test again. If you have a thermometer, the jam cooks at 104-105 degrees.
⏱ 5 min -
8
Jarring
Let it rest for 5 minutes so the pieces don't all rise to the top, stir it once, and pack it hot into the hot jars up to 1 cm from the rim. Wipe the rim and close immediately, and let it cool on the counter.
⏱ 10 min
Cooked it? Rate it
Your rating tells the next cook whether this recipe is worth their time.
✓ Thanks — your rating is in.
Tips that actually matter
- Do not reduce the sugar below 600 grams per kilo of strawberries — the sugar is what preserves the jam and thickens it, and less of it produces a runny jam that must be kept in the fridge and eaten quickly.
- Use a wide pot: the jam bubbles up to double its volume or more at the start of boiling, and a wide pot evaporates faster so the color stays red.
- Add a few strawberries to the kilo that are still firm and not very ripe — less ripe strawberries contain more pectin so the jam thickens faster.
- You can add a teaspoon of rosewater or grated lemon peel in the last two minutes for a different aroma.
People also ask
Why did the strawberry jam turn out runny?
It didn't reach the doneness stage, or there wasn't enough lemon, or the sugar was less than necessary. Return it to the pot and boil it strongly for 5 minutes and repeat the plate test — the jam handles a second cooking just fine.
Why did the jam set like Turkish delight or darken in color?
It was cooked more than necessary and the sugar started to caramelize. If it is still hot, add a quarter cup of boiling water and stir on the stove for a minute. Next time start the plate test early, because the jam thickens more as it cools.
Can I make jam with frozen strawberries?
Yes: thaw them in the fridge and keep the juice that comes out with them, and proceed with the same quantities. It will take about 5 minutes longer on the stove because it contains more water.
How long does homemade strawberry jam last?
In a sterilized jar closed while hot, in a dark, cool place: up to 6 months. After it is opened, it goes into the fridge and is eaten in about a month, and use a clean and dry spoon every time.
Cook mode
Homemade Strawberry Jam
-
1
Washing Before Hulling
Wash the strawberries while still with the green stem in cold water, dry them on a towel, and then hull them. Washing after hulling introduces water into the heart of the strawberries, so the jam takes longer on the stove and its color darkens.
-
2
Cutting
Leave small strawberries whole, and cut the large ones in half or four pieces, so all the pieces cook at the same time.
-
3
Maceration
In a wide, heavy-bottomed pot, toss the strawberries with the sugar and cover them, and leave them for at least 2 hours (or overnight in the fridge) until they release their juice and half the sugar dissolves. The pieces absorb the sugar so they stay intact and do not get mashed on the stove.
-
4
Sterilizing the Jars
Wash the jars and lids with water and soap, and put the jars in the oven at 120 degrees for 15 minutes, or boil them in a pot of water for 10 minutes. Place two small plates in the freezer for the doneness test.
-
5
Boiling and Skimming Foam
Turn on medium heat and stir with a wooden spoon until the sugar dissolves completely, then raise the heat to a strong boil. Remove the white foam that rises to the surface — the foam clouds the jam and shortens its shelf life.
-
6
Lemon and Cooking
Add the lemon juice and let it boil strongly for 15-20 minutes, stirring occasionally from the bottom so it doesn't stick. The lemon acidifies the jam so the natural pectin in the strawberries can set and thicken it, and the strong boil evaporates the water quickly so the color stays red.
-
7
The Cold Plate Test
Turn off the heat, and put half a teaspoon on the frozen plate and return it to the freezer for 1 minute. Push the drop with your finger: if it wrinkles and stays in place, the jam is ready, and if it runs, turn the heat back on for 3 minutes and test again. If you have a thermometer, the jam cooks at 104-105 degrees.
-
8
Jarring
Let it rest for 5 minutes so the pieces don't all rise to the top, stir it once, and pack it hot into the hot jars up to 1 cm from the rim. Wipe the rim and close immediately, and let it cool on the counter.



Comments
Cooked it? Tell us how it went, or ask a question — we read every comment.