
Russian Piroshki with Meat Filling
Piroshki are filled yeast buns, either fried or baked, and the filling can be meat, potato, cabbage or even sweet. The dough takes two rises — one before filling and one after — and it is that second rise that makes them light.
- Prep
- 30 min
- Cook
- 25 min
- Total
- 55 min
- Calories
- 290
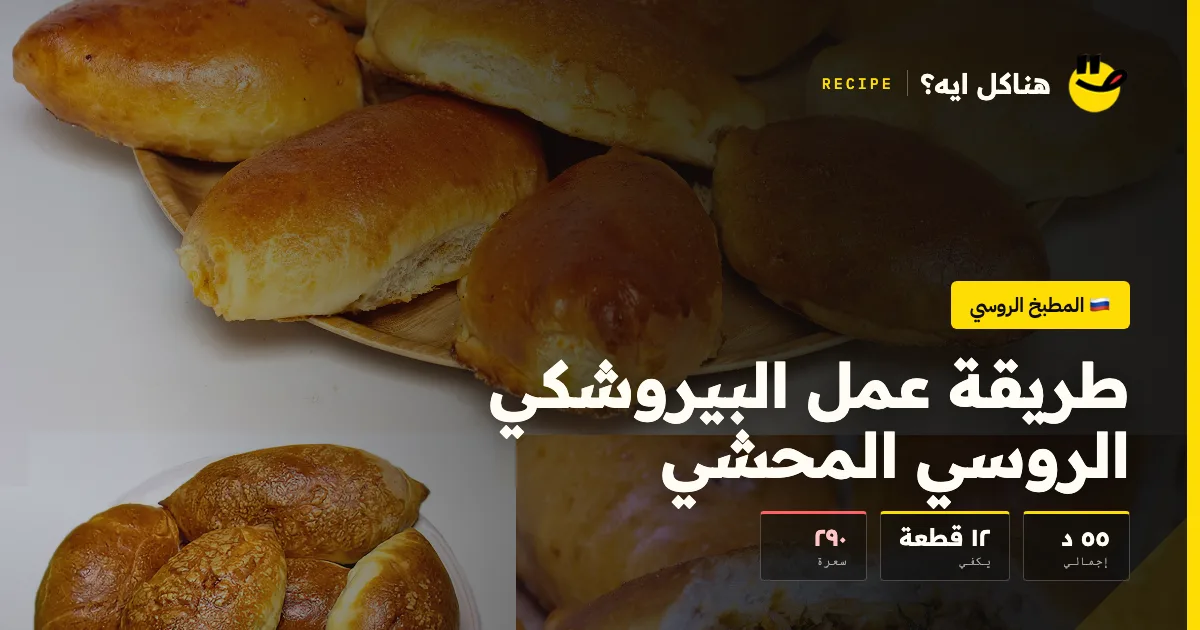
Piroshki are Russian street food through and through, eaten by hand at any hour. The name comes from "pirog", meaning pie. They illustrate the Russian logic perfectly: plain dough, a filling made from whatever is around, and the result is a cheap complete meal.
Method
-
1
Activate the yeast
Dissolve the yeast and sugar in the warm milk and leave it ten minutes until it foams. If it does not, the yeast is dead or the milk was too hot.
⏱ 10 min -
2
Knead
Add the flour, salt, egg and oil and knead for ten minutes until the dough is smooth and no longer sticks to your hands.
⏱ 12 min -
3
First rise
Cover and leave somewhere warm for an hour until doubled. Press it with a finger — if the dent stays, it is ready.
⏱ 60 min -
4
Make the filling
Fry the onion until golden, add the meat, salt and pepper and cook until completely dry. Let it cool before filling.
⏱ 20 min -
5
Shape
Divide the dough into twelve balls, roll each into an oval, place filling in the centre, seal the edges firmly and turn them seam-side down.
⏱ 15 min -
6
Second rise
Arrange them on a tray and cover for twenty minutes. This step is the secret to a light texture and most people skip it.
⏱ 20 min -
7
Fry or bake
Fry in medium-hot oil for three minutes a side, or brush with egg and bake at 190°C for twenty to twenty-five minutes.
⏱ 25 min
Cooked it? Rate it
Your rating tells the next cook whether this recipe is worth their time.
✓ Thanks — your rating is in.
Tips that actually matter
- The filling must be completely cold — hot filling melts the dough and makes them split open in the oil.
- The second rise after filling is not optional: it is what gives the light texture.
- If frying, keep the oil at medium, not high. High heat browns the outside while the dough stays raw.
- Baked are lighter and fried are softer — both are authentically Russian.
People also ask
Why do my piroshki split in the oil?
The edges were not sealed properly, or the filling was warm. Seal firmly, turn them seam-side down, and cool the filling.
Fried or baked?
Both are traditional. Fried are softer and richer; baked are lighter and better for large batches.
Can I use a different filling?
Yes — mashed potato with onion, softened cabbage, cheese, or apple for a sweet version. Same dough throughout.
How long do they keep?
Two days in an airtight tin. Baked ones freeze for three months and reheat straight from frozen.
Cook mode
Russian Piroshki with Meat Filling
-
1
Activate the yeast
Dissolve the yeast and sugar in the warm milk and leave it ten minutes until it foams. If it does not, the yeast is dead or the milk was too hot.
-
2
Knead
Add the flour, salt, egg and oil and knead for ten minutes until the dough is smooth and no longer sticks to your hands.
-
3
First rise
Cover and leave somewhere warm for an hour until doubled. Press it with a finger — if the dent stays, it is ready.
-
4
Make the filling
Fry the onion until golden, add the meat, salt and pepper and cook until completely dry. Let it cool before filling.
-
5
Shape
Divide the dough into twelve balls, roll each into an oval, place filling in the centre, seal the edges firmly and turn them seam-side down.
-
6
Second rise
Arrange them on a tray and cover for twenty minutes. This step is the secret to a light texture and most people skip it.
-
7
Fry or bake
Fry in medium-hot oil for three minutes a side, or brush with egg and bake at 190°C for twenty to twenty-five minutes.


Comments
Cooked it? Tell us how it went, or ask a question — we read every comment.