
Japanese Onigiri Rice Balls
Onigiri are triangles of Japanese short-grain rice shaped with hands wet with salted water, filled with tuna, salmon or pickles and wrapped in a strip of nori. The starch of short-grain rice is what holds the ball together — long-grain rice will never stick.
- Prep
- 25 min
- Cook
- 20 min
- Total
- 45 min
- Calories
- 210
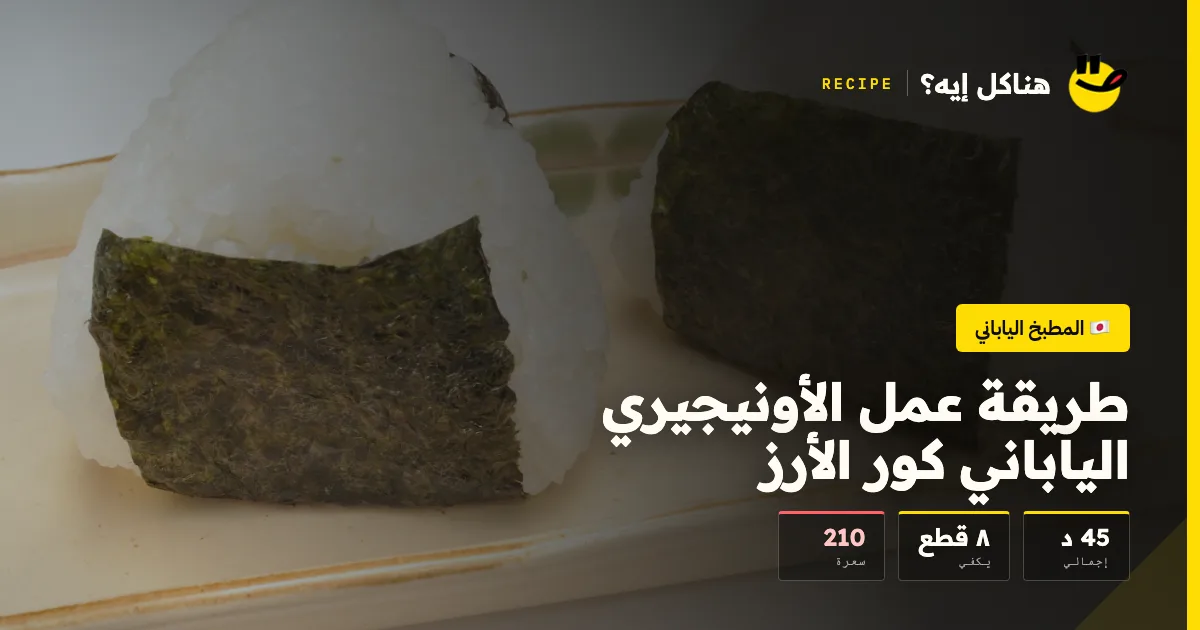
Photo: Ocdp — CC0 · Wikimedia Commons
Onigiri are Japan’s number-one street and travel food, sold in every corner shop there. They began as a practical way to carry rice in the hand without utensils — simple, but with rules of their own.
Method
-
1
Washing the rice
Wash the rice in cold water 4–5 times until the water runs almost clear, stirring it gently with your fingertips. Washing removes the excess surface starch that turns rice into paste, but leaves the inner starch that holds the ball together.
-
2
Cooking the rice
Drain the rice and leave it for 30 minutes to dry, then put it in a pot with the water at a ratio of 1:1.25. Cover it, bring it to the boil, then cook over the lowest heat for 12 minutes without opening the lid at all. Turn off the heat and leave it covered for 10 minutes more.
-
3
Stirring and cooling
Fold the rice with a wooden spoon using vertical cutting strokes, not circles, so the grains don’t get crushed. Let it cool until it is warm enough to hold — very hot rice will burn your hands, and very cold rice won’t hold together.
-
4
The filling
For tuna: mix the drained tuna with the mayonnaise and soy sauce. For salmon: flake the grilled salmon with a pinch of salt. The filling must be fairly dry — a runny filling wets the rice from inside and the ball falls apart.
-
5
Shaping
Wet your hands in the salted water (it stops sticking and seasons the rice at the same time). Take 80 g of rice in your palm, make a hollow in the middle, add a teaspoon of filling and close the rice over it.
-
6
The triangle
Shape the ball into a triangle by cupping one palm and pressing lightly with the other hand on each side — 3 turns are enough. Too much pressure turns the rice into a hard paste. A flattened triangle is the traditional shape.
-
7
Nori and serving
Wrap a strip of nori around the base or over one face. If you’ll eat them straight away, add the nori now. If they are for later, wrap the nori separately and add it when eating so it stays crisp.
Cooked it? Rate it
Your rating tells the next cook whether this recipe is worth their time.
✓ Thanks — your rating is in.
Tips that actually matter
- Short-grain rice only — long-grain won’t hold together whatever you do.
- Wet your hands with salted water; it stops sticking and seasons at the same time.
- Press lightly — too much pressure turns the rice into paste.
- The rice should be warm, neither hot nor cold, when shaping.
- Wrap the nori at eating time if they won’t be eaten straight away.
People also ask
How long do they keep out of the fridge?
Up to 4–6 hours in a fairly cool place — that was their original purpose as portable food. The salt in the rice and the nori help. In very hot weather, keep them in a cool bag, and take extra care with fish fillings.
Why do my onigiri fall apart?
Either the rice isn’t short-grain, you washed it too much and lost the starch, the rice was cold when shaping, or the filling was runny. Check all four in that order — the first two cause 80% of cases.
What other fillings are there for onigiri?
Umeboshi (pickled plum), the most popular in Japan, grilled salmon, tuna mayo, fish roe and teriyaki chicken. They are also made plain with just salt — then they are called shio musubi.
Can I use Egyptian rice?
Yes, it is the closest substitute available, because it is short-grain and high in starch. Wash it only 3 times (not 5) because it has less starch than Japanese rice, use a water ratio of 1:1.2, and try a small batch the first time.
Cook mode
Japanese Onigiri Rice Balls
-
1
Washing the rice
Wash the rice in cold water 4–5 times until the water runs almost clear, stirring it gently with your fingertips. Washing removes the excess surface starch that turns rice into paste, but leaves the inner starch that holds the ball together.
-
2
Cooking the rice
Drain the rice and leave it for 30 minutes to dry, then put it in a pot with the water at a ratio of 1:1.25. Cover it, bring it to the boil, then cook over the lowest heat for 12 minutes without opening the lid at all. Turn off the heat and leave it covered for 10 minutes more.
-
3
Stirring and cooling
Fold the rice with a wooden spoon using vertical cutting strokes, not circles, so the grains don’t get crushed. Let it cool until it is warm enough to hold — very hot rice will burn your hands, and very cold rice won’t hold together.
-
4
The filling
For tuna: mix the drained tuna with the mayonnaise and soy sauce. For salmon: flake the grilled salmon with a pinch of salt. The filling must be fairly dry — a runny filling wets the rice from inside and the ball falls apart.
-
5
Shaping
Wet your hands in the salted water (it stops sticking and seasons the rice at the same time). Take 80 g of rice in your palm, make a hollow in the middle, add a teaspoon of filling and close the rice over it.
-
6
The triangle
Shape the ball into a triangle by cupping one palm and pressing lightly with the other hand on each side — 3 turns are enough. Too much pressure turns the rice into a hard paste. A flattened triangle is the traditional shape.
-
7
Nori and serving
Wrap a strip of nori around the base or over one face. If you’ll eat them straight away, add the nori now. If they are for later, wrap the nori separately and add it when eating so it stays crisp.


Comments
Cooked it? Tell us how it went, or ask a question — we read every comment.